

Table of content


Fig.1: Struture of the project
Preparation
In the src folder of your React project, create a components folder.
App.js
- In the App.js file we will import and use the
ImageUploadcomponent. We will create theImageUploadcomponent in the next section. - The
selectedImagesstate will store all the image objects that you are uploading. - Below is the code for the App.js file.
1import { useState } from "react";
2
3import "./styles.css";
4import ImageUpload from "./components/ImageUpload";
5
6export default function App() {
7	const [selectedImages, setSelectedImages] = useState([]);
8	return (
9		<div className="App">
10			<h1>Image Upload in React</h1>
11			<ImageUpload selectedImages={selectedImages} setSelectedImages={setSelectedImages} />
12		</div>
13	);
14}
- Our initial folder structure looks like this:
src/
├─ components/
├─ App.js
├─ index.js
├─ styles.css
ImageUpload Component
Creating the ImageUpload Component
- Create an ImageUpload.js file in the component folder.
- The
selectedImagesprop stores theFileobject returned by theinputwhen selecting and uploading images. - The
selectedImagesURLstate stores the URL created using theURL.createObjectURL()method. The URL represents theFileobject given in the parameter ofURL.createObjectURL(). - The below code allows a maximum of three image uploads.
disableImgUploadstate handles enabling and disabling the upload button. - Below is the code for the ImageUpload.js file.
1import { useState, useRef } from "react";
2
3import classes from "./ImageUpload.module.css";
4
5function ImageUpload({ selectedImages, setSelectedImages }) {
6	const [disableImgUpload, setDisableImgUpload] = useState(false);
7	const [selectedImagesURL, setSelectedImagesURL] = useState([]);
8	const browseBtn = useRef(null);
9
10	const onSelectFile = (e) => {
11		const selectedFile = e.target.files[0];
12		const selectedFileUrl = URL.createObjectURL(selectedFile);
13
14		/*Limiting the image upload*/
15		if (selectedImages.length < 3) {
16			if (selectedImages.length === 2) {
17				setDisableImgUpload(true);
18			}
19			setSelectedImages((prevImages) => prevImages.concat(selectedFile));
20			setSelectedImagesURL((prevImagesURL) => prevImagesURL.concat(selectedFileUrl));
21		} else {
22			alert("No more than 3 images allowed");
23		}
24	};
25
26	function deleteHandler(imageIndex) {
27		const newSelectedImages = selectedImages.filter((image, index) => index !== imageIndex);
28		const newSelectedImagesURL = selectedImagesURL.filter((imageURL, index) => {
29			if (index !== imageIndex) {
30				return imageURL;
31			} else {
32				URL.revokeObjectURL(imageURL);
33			}
34		});
35
36		if (newSelectedImages.length < 3) {
37			setDisableImgUpload(false);
38		}
39		setSelectedImages(newSelectedImages);
40		setSelectedImagesURL(newSelectedImagesURL);
41	}
42
43	return (
44		<section>
45			{/* Upload Section */}
46			<div className={classes.browseImageContainer}>
47				{/* Hiding input and using the alternative button with our own styling*/}
48				<input
49					style={{ display: "none" }}
50					disabled={disableImgUpload}
51					ref={browseBtn}
52					type="file"
53					name="images"
54					accept="image/png, image/jpeg, image/webp"
55					onChange={(e) => onSelectFile(e)}
56				/>
57				{/* Alternative upload button */}
58				<div
59					className={classes.uploadBtn}
60					disabled={disableImgUpload}
61					onClick={() => browseBtn.current.click()}
62				>
63					{`Upload ${selectedImagesURL.length}/3`}
64				</div>
65			</div>
66			{/* Image Preview */}
67			<div className={classes.selectedImagesPreview}>
68				{selectedImages &&
69					selectedImages.map((image, index) => {
70						return (
71							<div key={index} className={classes.imagePreviewContainer}>
72								<img
73									src={selectedImagesURL[index]}
74									className={classes.imagePreview}
75									alt={selectedImagesURL[index]}
76								/>
77								<div onClick={() => deleteHandler(index)} className={classes.deletePreviewImg}>
78									Delete
79								</div>
80							</div>
81						);
82					})}
83			</div>
84		</section>
85	);
86}
87
88export default ImageUpload;
Note: In the above code, we have hidden the file type input and used an alternative button with the help of
useRef()hooks.
Styling the ImageUpload component
- Create a ImageUpload.module.css file in the component folder.
- Below is the code for ImageUpload.module.css file.
1.browseImageContainer {
2	display: flex;
3	flex-direction: row;
4}
5
6.uploadBtn {
7	cursor: pointer;
8	background-color: #2563eb;
9	color: #e2e8f0;
10	padding: 0.5rem;
11	margin-left: 0.5rem;
12	border-radius: 0.375rem;
13}
14
15.uploadBtn:hover {
16	background-color: #3b82f6;
17}
18
19.selectedImagesPreview {
20	display: flex;
21	flex-direction: row;
22	justify-content: space-around;
23	background-color: #e2e8f0;
24	border-radius: 0.375rem;
25	margin: 0.5rem;
26	width: 100%;
27	height: 11rem;
28	padding: 0.5rem;
29}
30
31.imagePreviewContainer {
32	display: flex;
33	flex-direction: column;
34	width: 10rem;
35	height: 10rem;
36	border: solid transparent 2px;
37	border-radius: 0.375rem;
38	overflow: clip;
39	padding: 0.25rem;
40}
41
42.imagePreviewContainer:hover {
43	border-color: #64748b;
44}
45
46.imagePreview {
47	position: relative;
48	width: 100%;
49	height: 9rem;
50	object-fit: cover;
51	border-radius: 0.375rem;
52	margin-bottom: 0.25rem;
53}
54
55.deletePreviewImg {
56	cursor: pointer;
57	background: #ef4444;
58	color: #e2e8f0;
59	padding: 0.25rem;
60	border-radius: 0.375rem;
61}
- Our final folder structure looks like this:
src/
├─ components/
│  ├─ ImageUpload.js
│  ├─ ImageUpload.module.css
├─ App.js
├─ index.js
├─ styles.css
- Final result looks like this:
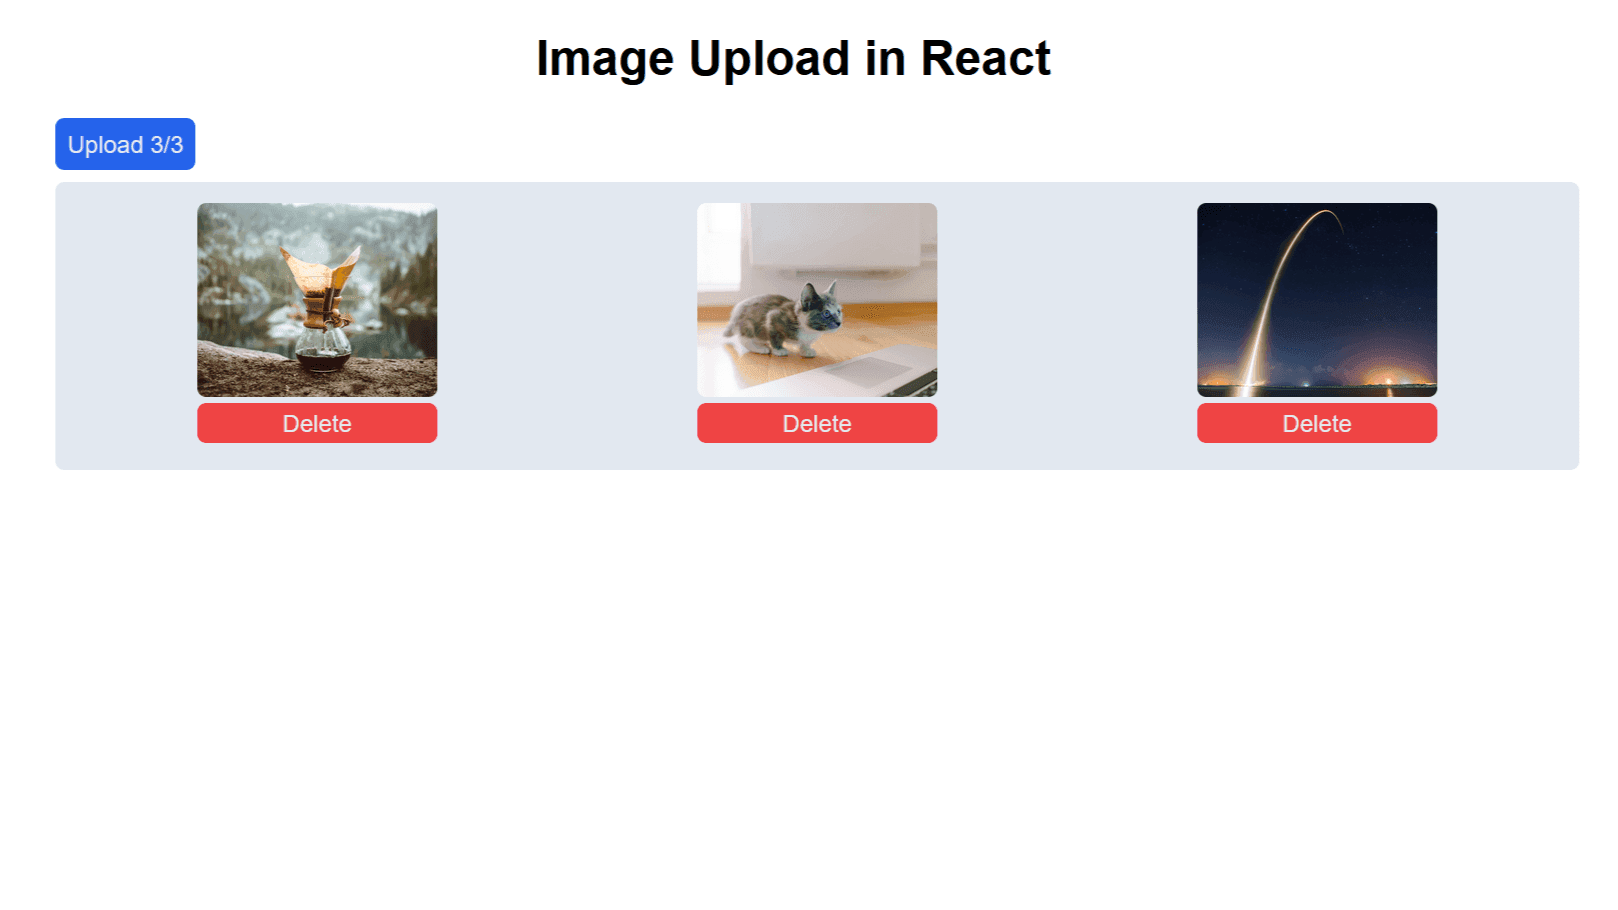
Fig.2: Final Result
Conclusion
You can optimize the above code and limit the image upload size. You can use the size property of the File object, which will return the file size in bytes. Here is an example:
1function ImageUpload({ selectedImages, setSelectedImages }) {
2	const MAX_PHOTO_SIZE = 2000000; // 2MB
3	const [disableImgUpload, setDisableImgUpload] = useState(false);
4	const [selectedImagesURL, setSelectedImagesURL] = useState([]);
5	const browseBtn = useRef(null);
6
7	const onSelectFile = (e) => {
8		const selectedFile = e.target.files[0];
9		const selectedFileUrl = URL.createObjectURL(selectedFile);
10
11		if (selectedFile.size > MAX_PHOTO_SIZE) {
12			//set error or alert
13			return;
14		}
15
16		//...code
17	};
18
19	//..code
20}
Thanks for reading this article. Don't forget to check out my other articles. You can support this article by sharing it.